Saturday, August 30, 2008

Pasta Salad

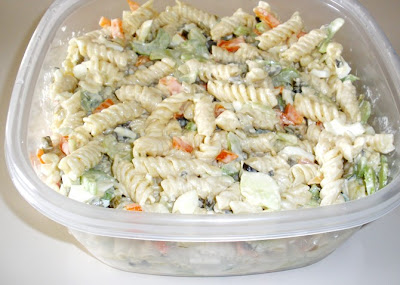
Today I made my daughter's favorite pasta salad and I thought I would share my recipe. Actually I don't have a written recipe. I always just make it by tossing in a little of this and a little of that. I've made it so many times it is like I just know what to put into it.

Cook one 16 oz box of Muellers Rotini Twists. Drain and let cool
Hard Boil 6 eggs, peel and chop
1 cup of chopped celery
1/2 of a large bell pepper, chopped (you can use yellow, red or green, whichever you pefer)
1 large peeled cucumber, chopped
1 cup sweet pickle salad cubes
About one cup of mayonnaise
Salt to taste

First stir the mayonnaise and pasta together, mixing in the mayo evenly.
Then mix in all the other ingredients.
You can add more or less of each ingredient, depending what you like.
This makes a large portion and of course, should be refrigerated. It can be kept well for about 3 or 4 days.
And here it is in my gallon size Glad Ware, ready to be sealed and refrigerated until mealtime!
More Country Angel Pins

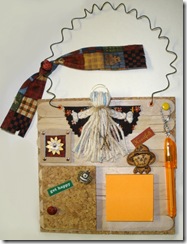
I found these angels that I made and had forgotten about. This is another version of the country angel pins that I posted here earlier this month. The instructions are there on that previous post. The difference is that I gave these angels little arms by picking up a few strands of yarn on each side and braiding them and tying off the ends. The one on the bottom left has a piece of yarn for the halo instead of the wire. The bottom right angel's arms are brought together in front and a little ribbon flower with a bead center is glued on.

Tuesday, August 26, 2008

Password -URL Keeper

It is difficult to keep up with all the websites, blogs, email servers, and other places I have to sign into with passwords so I made these little cards that will fit into a file box. If I don't use a file box, they are a good size to slide beneath a mouse pad to keep them handy and close by.
Since the most used file boxes are made for 3x5 inch or 4x6 cards, I made 2 sizes. Both sizes are png format so they are transparent. If I decide to I can add my choice of graphics. 110 lb cardstock works very well for these cards. Another idea is to print them on light colored cardstock. Either way, they should come in very handy.
I have stored these cards in my photobucket album so I can share them with anyone who would like a copy. If you do want a copy or copies, click on the links below and when the page opens up, you will see the preview. You then have to click on it again to go to the full size. When it goes to the full size, all you do is right click on the template and save a copy to your computer!
Be sure to save the template as a png or you will not be able to add a graphic behind the lines. Saving as a jpg is fine if you do not want to add graphics. They look very large because I set the resolution (pixels per inch) to be at 300%, but they will print out at 100%.

Click here to find the 3x5 inch password card.
Click here to find the 4x6 inch password card.

Here is a jpg sample of what they look like:
2008©craftythisandthat

Friday, August 22, 2008

Tic Tac Toe CD Case

I made this Tic Tac Toe game a couple of years ago. It is made in a regular (not slim) jewel cd case.The first step in making this is to carefully remove the inside piece that holds the cd. It can be snapped out easily by sliding something thin like a nail file between it and the box, but be careful not to break the cd box itself. After that is removed, it will leave an open space in the side end that will easily hold a mini pen or pencil. The pen I used came with the chain attached. It is one of those with 4 to a card for 99 cents. I heated an awl to melt a small hole in the end of the cd to insert the chain. I made a little barrell to slide the pen into by rolling up a small piece of card stock and used a strong glue to hold it in place. That makes a place for the pen to stay put and not just dangle. After that all you need to do is choose your graphics and print them into the template parts, cut them out and place them into the cd case. I used small dot of glue on the corners to hold the papers in place. I added a small 2x2 stick it note pad inside the front cover to keep scores and I made a small envelope to hold the playing pieces. Tip: I used a printable magnet sheet for the game card on the back inside and also for the game pieces. That way you have a magnetic game and the pieces will not be sliding everywhere. The other graphics were printed on card stock. That's about it. You can download all the templates to make the tic tac toe cd game here. I included all pieces necessary, including the envelope and game piece template, to make this tic tac toe game kit

download

graphicsLaurieFurnell©pcCrafter.com
Front

tictactoefront

Inside Left

tictactoeleftinside

Inside Right (game and game pieces)

tictactoerightinside

Back

tictactoeback

Tuesday, August 19, 2008

Craft Sticks

Craft sticks can entertain children for hours. There are so many easy and fun crafty ways to use these sticks. Have your kiddies recycle those popsicle sticks by saving them instead of dropping them in the trash can. It is also a good way to teach the little ones to recycle and reuse as well as the art of crafting. If you don't have enough popsicle sticks, you can buy the craft sticks in any craft department. They are very inexpensive and usually have many in a package.

I searched for some interesting craft stick projects and there are so many it is hard to choose the best. I'm listing just a few that I like but if this is not enough just type popsicle stick crafts or craft stick into google search and you will find many.

Angel Craft

http://www.theartfulcrafter.com/kids_crafts.html

Halloween Crafts

http://www.familycorner.com/family/kids/crafts/ghoulish_stick_figures.shtml

A Frog Door Hanger

http://www.makingfriends.com/Hoponindoorhanger.htm

Christmas Star Ornaments

http://www.daniellesplace.com/html/christmas.html#

Waste Not Picture Frame

http://www.seedsofknowledge.com/puzzleframe.html

A Wishing Well

http://familycrafts.about.com/cs/forpreschoolers/l/blwishwll.htm

American Flag

http://www.enchantedlearning.com/crafts/july4/craftstickflag/

I like to play with craft sticks too. A few months ago I entered a challenge on a craft message board. The challenge was to make something from craft sticks. I made these two little projects and entered them. Neither of them was a winner but they were so much fun and easy to make.

The snowman was made simply by cutting a piece of card stock for the backing. Paint the popsicle sticks white and glue them side by side to the card stock.The card stock should be cut just a bit smaller than the sticks. Draw a hat shaped pattern and cut it from black foam or felt or card stock, whatever you have that will work. I used sparkly felt and glued a small piece of red ric-rac for the hat band and glued on the plastic snowflake. Cut a piece of wire about twice the size you want the hanger to be. Twirl it around a pencil to form the loops. Slide it off the pencil and bend it to the shape you want. The wire hanger is attached to the sticks or you could make the backing a little taller than the sticks, but below the top of the hat, and run the wire through that. You can add a bead or a little jingle bell to the wire. I used fun foam for the cheeks and nose, added googley eyes and a mouth cut from the same felt as the hat.

The mini message board was made using a 6x6 inch square cork board and 6 inch craft sticks attached to the cork. I embellished it with a few things I already had in my craft room.

Click on each photo for an enlarged view.

popsicle snowman ornament or decoration craft stick message board

Tuesday, August 12, 2008

One Page Calendars

I made more calendars! This time they are again all twelve months on one page, but they are a full page size. I think they could be made a little smaller by resizing them but I like this size. I'm showing a sample of two of them here and giving away my template again! I've included two templates in the download, one with the 2009 date added and one without it. The date can be added in your graphic program and matched to your graphics. You can add graphics on the top part and also behind the numbers, because I've made the template transparent.
So go ahead and click on my 4 Shared link here and have fun with them. I did!
graphics used are by Tina Wenke and Susan Seals ©pcCrafter

(click sample photo for a larger view)

Monday, August 11, 2008

Eastern Swallowtail Butterfly

I have flowers planted on the east side of my house and by the garage. I once knew the name of the flowers but today I can't remember what they are. They are perennials and have multiplied so there is enough nectar for the butterflies, the hummingbirds and the bees. I see the honey bees and bumble bee's visiting often, but this weekend the Eastern Tiger Swallowtail butterflies were gathering all over them. That was a beautiful site, especially because last year the area had so much dry weather, the butterflies did not appear.
Does your state/province/country have an official insect? If you live in the USA you can check HERE for the list of states that have an official state insect. Forty-one of the states do have at least one official state insect listed. My state, Georgia has 2 state insects listed. The Honey Bee and the Eastern Tiger Swallowtail butterfly. My "real" home state, Virginia, where I was born and lived there many years, also lists the Tiger Swallowtail as its state insect.
I grabbed my camera and snapped several photos but with all the fluttering and quickly moving about, I was able to get one good snapshot of this beauty, and I must say, it is a pretty good shot. I also snapped a close up of one of the flowers. I am happy with my little Olympus FE340 8.0 5x camera.
(click photo for a better view)


Friday, August 8, 2008

Magnetic Calendars

I hope I do not seem to be rushing the next year in but I have been playing around with a calendar template and made it transparent and I also made it with the blank center so that graphics or a background can be added behind it and/or in the center of the calendar. I think it came out nice and today I printed out some calendars on magnet sheets. These can be use on a refrigerator, school locker, office cabinet or other metal surfaces.
I originally made a 6x6 inch template but then decided that If I made it 5x5 inches I could easily print 2 of them on a full size magnet sheet. I used the Avery Magnet sheets which have a matte surface and they print out nicely. I printed 2 sheets then put them back to back, slid them between laminating sheets and run them through my Scotch brand heat laminator. By doing them back to back, I can laminate both sheets in one run. Then I cut them out and separate them, ending up with 4 magnets with a laminated front.
I've decide to share my blank calendar template with anyone who would like to make some of these fun little calendars and I've include the two sizes in the download. The templates are PNG format and transparent. You can get my blank calendar templates HERE at my 4shared account.
graphics used are ©pcCrafter


This is a close up of one but I had to tilt my camera so that I didn't get a flash back from the shiny lamination. It looks a little distored but it really isn't. :-)
Click on the photo to enlarge.

Angel Magnet

I made this angel in a similar way that I did the little pin in the previous post. One difference is I used 2 circles of cloth, instead of one, the same size, about 3 1/2 inches.
I folded them both in half, but on one of them I brought both of the top ends together and pointed them down, like a shawl would fold over your arms. I used a wooden button for the head, a little curl of craft hair, tiny wooden heart for decoration, one popsicle stick cut in half for the legs, a bit of paint or magic markers, tiny beads for the top of her head, a flat button, a little larger than the head, glued to the back of her head to look like a halo, then a magnet glued to the back of the button.


Front view - photos ©2008jpCraftyThisandThat

Back View -Showing how the legs are cut and placed. You can glue them between the layers of cloth or on the back as you see these.

another one-you can see the way the cloth is folded in this one.

Tuesday, August 5, 2008

Country Angel Pin

I call these country angels. They are quick and easy to make.

It only takes a 3 1/2 inch circle of cotton cloth, strands of cotton yarn, a short piece of ribbon, wire for the halo, a pin for the back and a good glue such as E-6000.

First I formed my wire into a small circle about an inch in diameter. I folded the 3 1/2 inch circle of cloth in half to form the wings. I then added a little dot of glue in the middle of the half circle to hold the 2 sides together. For the head and body, I cut as many strands of cotton yarn that is needed to make it look nice. It really depends on what thickess of yarn I am using and how full I want it to look. I cut about 18 strands to about 6 inches long for this one. After they were cut and gathered together nicely so the ends are about even, I carefully thread one end of the strands of yarn through a wire circle, and fold the yarn over the part of the wire where the wire is fastened together, checking to make sure it is folded in the middle and both ends of the yarn are brought together so that all the ends are about the same length. If some are a little off, they can be trimmed or left as they are. Next, I carefully tied the ribbon around the neck to form the head and body. The body was glued to the cloth circle that was folded in half and a pin glued to the back. Let the glue dry thoroughly.
Easy!
Pin Front photos ©2008jpCraftyThisandThat


Pin Back


This photo shows the pin size. Each square on the green mat is a 1 inch square so the pin is about 3 1/2 inches wide x about 3 inches high.

Saturday, August 2, 2008

Pac-Man Cookies!

These are the cutest sugar cookies!
I ran across the Snack or Die website while stumbling through the internet this morning and these cookies absolutely caught my eye. These would be so nice to make for the gamers in your family or for any pacman fan.
Jocelyn Anderson also has other gaming cookies there including the cheddar Pac-Man crackers.
With her permission, I'm posting this picture and a link to the website. I know you will want to go visit her and see these and her other yummy looking snacks!

Click here Snack or Die photo©Jocelyn Anderson

Friday, August 1, 2008

More Altered Tobacco Tins

I think this is an easy and quick way to turn an ordinary tin into something pretty instead of it ending up in the garbage and then in landfields.

The first tobacco tin that I altered and, and also the original tin before I altered it be seen on a previous post at the following link.
http://craftythisandthat.blogspot.com/search/label/Altered%20Tobacco%20Tin
The directions are also on that page.


I lined the inside bottom and lid with stick on black felt


This is a view of the inside lid - a close up of the felt lining .