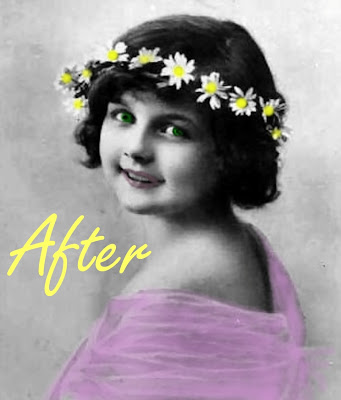
Many of you probably know how to do this and may do it in a different way, but I wanted to share how I did this photo.
I use Microsoft's Digital Image 2006 photo editing software, but I'm sure with a few tweaks this could be done in similar steps with the other digital imaging programs.
If you click on each picture, it will give you an enlarged version.

copyright free photo
Before you work on any section, always click on the part that you will be working on which will give it the blue highlight color. You will see the highlighted part in the stack, right column. It will look like it has a blue shadow over it. If you start to color in a section with the transparency brush and it does not do anything, go back and make sure you have the photo or section that you will be working on highlighted.
The first step is to open your graphic in your editing program and duplicate
your image then close it out. Use the duplicate photo to edit.
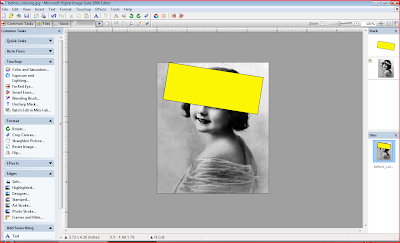
Click on the Insert button and choose shape then choose the square.

Next use the mouse to pull and resize the square into a rectangle shape and tilt it into the position of what you want to color. In this example it will be
the centers of the daisies that will be colored yellow.
Next, with the rectangle highlighted, click on the Effects button then choose Fill with Effects or Color.

Next, choose the color to fill the shape.

After you have your color, click done and it will take you back to the work area.

Then, go to the yellow shape in the stack and hold down the left mouse
button on it and drag it below the photo in the stack. This will move the
yellow shape behind the photo.

The yellow shape is now behind the photo.
The next step is to highlight the photo that you will be working
on in the stack.

Then click on the Effects button again but this time choose
Transparency then choose Transparency Brush.
Here you will choose your brush size and the amount of transparency you need.
Your mouse pointer will turn into a round tip brush, so adjust the brush by changing the numbers up or down.
Use it to click away the parts of the photo you want the yellow color to show through.

Continue on until you have colored in all the yellow in the flowers.

After you have finished with this first step, go back to the work tray and do the same with the other sections of the photo that you would like to color.
Do each section in the same manner in which I colored in the yellow in the flowers. Add a shape and fill it in with the color you choose, slide it behind the photo, with it in the correct position and then go to the transparency brush.
These little step by step actions will give you a beautiful colored effect!
Below is a screen shot of all the steps I took in coloring in this photo. I added a yellow color for the flowers, a green color for the eyes, pink for the lips and a lavender color for the gown.

Isn't she pretty?

6 comments:
what a BEAUTIFUL picture! Thank you for sharing the coloring tut too!! wishing you a very HAPPY NEW YEAR! :D
It seems like it's very time intensive but the results are fabulous!
I would love to get better at doing this kind of thing. I guess it takes time and lots of practice. Thanks for the tutorial.
Thank you for the wonderful tutorial! My daughters and I were just talking about wanting to learn how to do this AND in Microsoft not Photoshop. Thank you so much!
What a wonderful Tutorial I am not the smartest girl on the block but I am going to give this a try
Thank you so much for sharing this!! I've gotta try!!
Post a Comment