Saturday, April 26, 2008

Darn-it Doll

This is my version of the "dammit doll". I'll call it the "darn-it doll". I've made several of these and each one has been different and one of a kind. I think most everyone could use one of these. They are very easy to make. Just draw out a pattern that looks like a gingerbread boy and about an inch or so larger all around for the edges after you sew. Use any material you like.
I used old jean material for these two. Make 2 identical pieces, one for the front and one for the back. First I embellish the front piece with buttons, patches or whatever I have to make it look like I want it. You can make these as cute or not so cute as you want, it doesn't matter because it is meant to be used as a stress reliever.
If you feel like exploding, just pick up the "darn-it" doll and take your frustrations out on the doll. I sew mine right sides out and leave an opening a few inches to stuff it loosely with fiberfill. Then I stitch the opening closed. I then add a ribbon and a tag with the following saying or something similar:

Whenever things don't go so well
And you want to hit the wall and yell
Here's a little dammit doll
That you can't do without
Just grasp it firmly by the legs
And find a place to slam it
And as you whack it's stuffing out
Yell, "Darnit, Darnit, Darnit!"

Tuesday, April 15, 2008

Country Angel

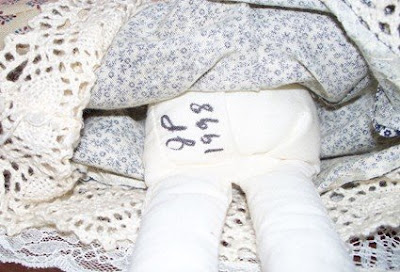
I made this little country angel about 10 years ago (as you can see by the date). I didn't have a pattern for this. As I remember, I just cut out the body and dress by guess from cotton scraps and stuffed it with fiberfill. The Hair is dry floral spanish moss. I think that is what it is called.


back

Tuesday, April 8, 2008

CD Canister

I covered this CD canister with some pretty graphics by Carolee Jones
front:


Back:

Thursday, April 3, 2008

Hummingbird Note Cards

I made these cards from card stock and used matching invitation size envelopes that I purchased.
For the card I cut a pastel colored 8 1/2 x 11 inch piece of card stock
in the portrait position across the middle giving me 2 pieces. I made a vertical score in each half and folded each, giving me two 4 1/4 x 5 1/2 inch cards. (Sometimes I make one score down the middle of the card stock page before I cut the page in half. This saves one step.) The front design is printed on white card stock and cut out. I make 4 of the fronts to an 8 1/2 x 11 inch piece of card stock. I then embellish the design as I desire and glue it to the front of the folded card. The inside is blank for notes or a message. These cards are super easy to make.

(click on photos to make them larger for viewing)

graphics I used on these are © Carolyn Shore Wright


Wednesday, April 2, 2008

Button Wreath

I made this little button wreath for my craft room. It is very easy to make and a good way to use up extra buttons. I glued the buttons and little gold roping onto a mini CD, covered the back with a piece of black felt but you could also cover the CD with some pretty cloth or just cut a piece of card stock the same size to cover it. On this one I covered the center with a big button that I think is pretty and gives it a different look.

Front (click on picture to view an enlargement)


Back


Here are some websites that have button wreaths.
pixiegenne
shimandsons
littlebirds
marthastewart
craftychix
cakeandpie
allthingschristmas
barbarah
sewnancy
ehow
ihavetosay